

I’m changing things up a bit today. Instead of featuring a vendor, doing an inspiration board, or sharing a wedding detail I like, I decided to do a DIY (do it yourself) project! A small disclaimer: I am not a crafty person. The fact that I made this and its looks pretty darn good is a huge accomplishment! So, pretty much, if I can do it, anyone can do it! I found this DIY on My DIY Wedding Day. If you’re looking for some projects you can do yourself for your wedding day, be sure to check out this site! They literally have hundreds of different DIY projects and they’re all so great!
The project I picked for today’s W.W. is a Mum Ring Bearer Pillow. I though this project was not only adorable but the perfect thing to get ready for spring!
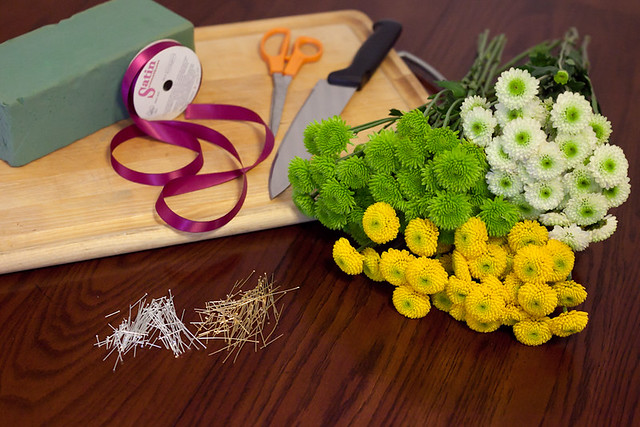
What you’ll need:
Block of foam
Mums
Ribbon
Pins
Knife
Scissors
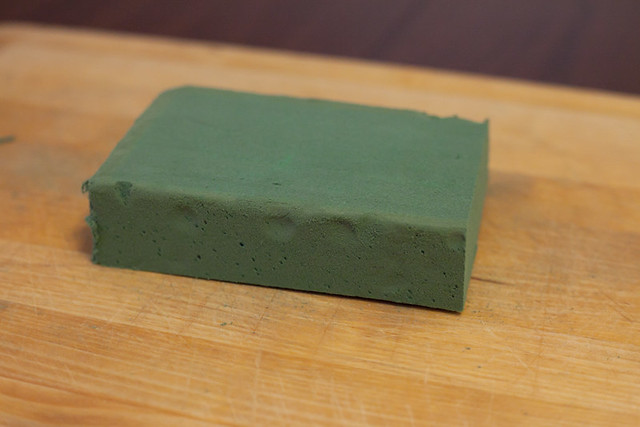
Step 1:
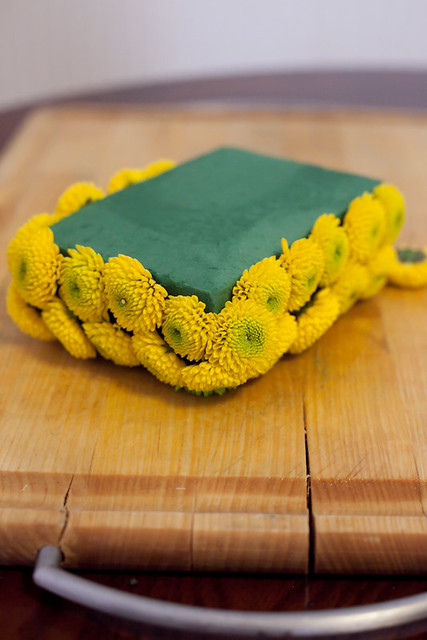
Cut your piece of foam into the shape you desire. I used florist foam, which is the type you soak so the flowers can absorb the water. Instead of soaking the foam I took an old hair spray container and filled it with water and just sprayed it, that way it wasn’t totally soaked but I could still misty the flowers on it through the process.
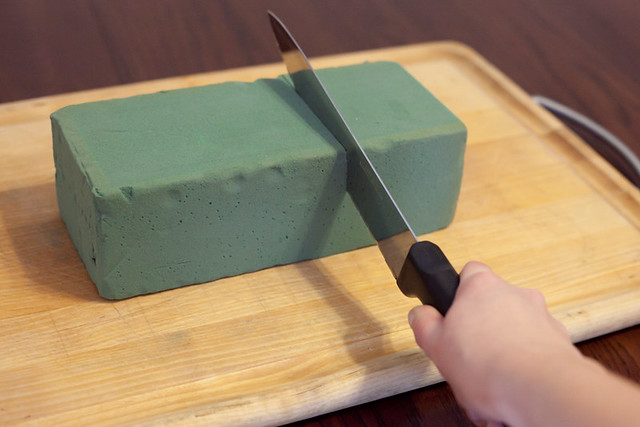
Remember that, normally, little kids are going to be holding this pillow. So make sure it’s a size that isn’t going to be awkward for them to carry. You can get the foam in all different shapes and sizes, even round! It’s all depends on what you think will go best with your wedding and your theme. I chose a simple rectangular shape for today.
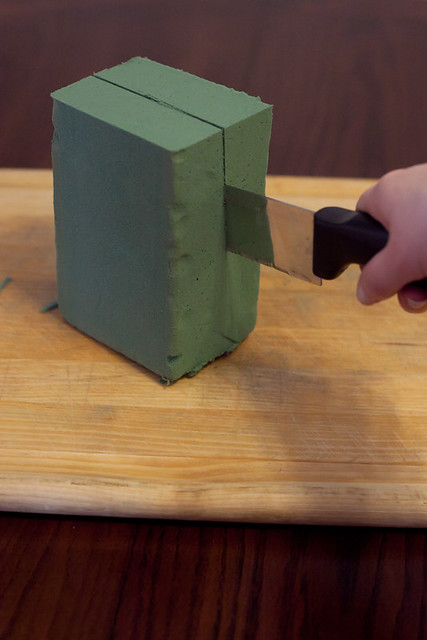
I also used a cutting board- this foam flakes easily and can get pretty messy.
Step 2:
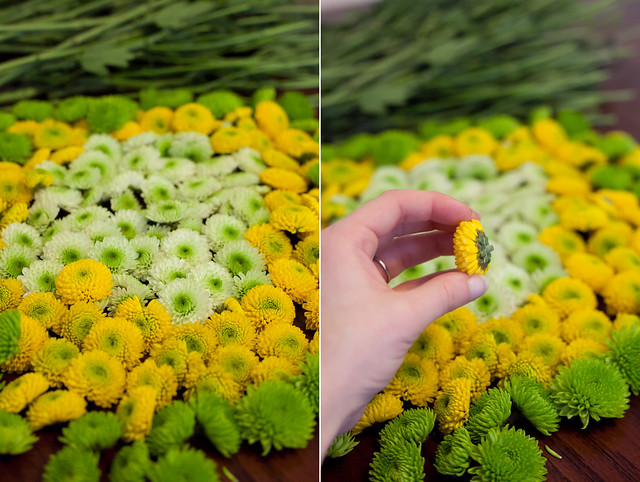
After you have the foam in the shape you want, it’s time to cut the flowers. I bought four different bouquets of mums from my local grocery store. If you would like different colors, go to your local florists and see if you can order different colors from them. Cut the flowers just below the bloom so there is no stem at all. Be sure to have enough flowers. Even if you end up having more than you need, like I did, it’s always great to have fresh flowers around the house.

Here is what things should look like when you are finished cutting all your flowers. Aren’t you loving the colors?!
Step 3:
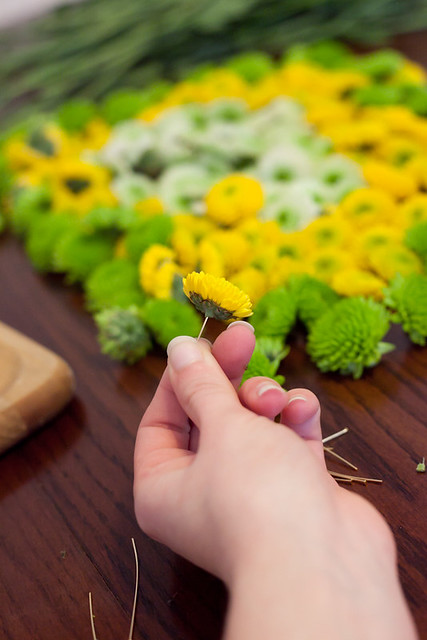
Take a pin and stick it through the middle of the mum. Be sure to buy the pins that have a flat head, that way they don’t go completely through the mum. They had all sorts of decorative pins at AC Moore, with little hearts and stars at the end in different colors. I stuck with simple silver and gold pins this time around.
Step 4:
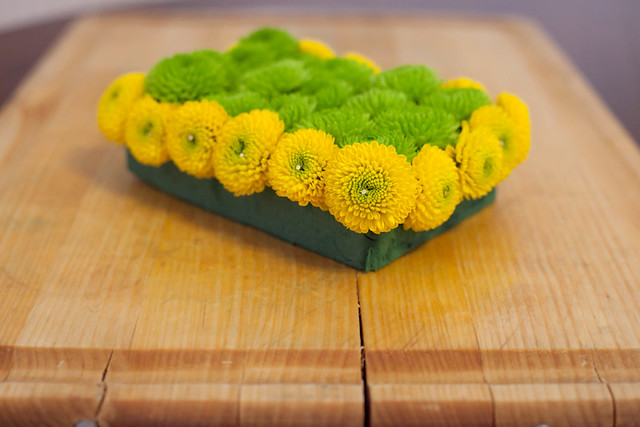
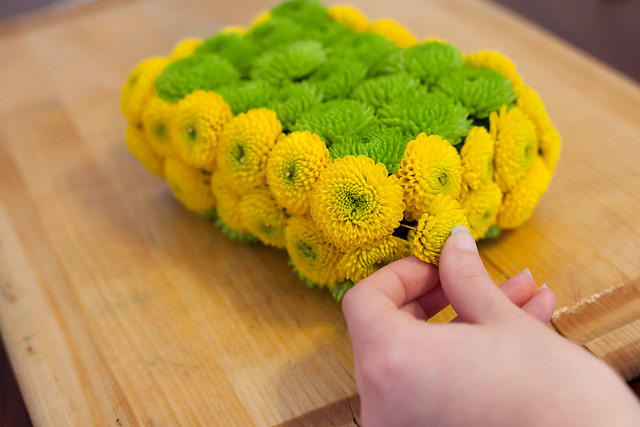
The moment of truth! Start pinning the mums to the foam. Start along the edge and work your way up.
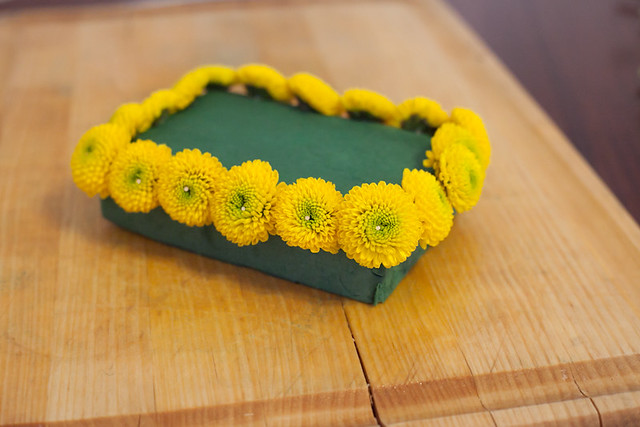
Be sure to compare different sizes in order to fill in any gaps. If you don’t like how something looks, try another mum. Take your time and don’t rush the process.
Step 5:
When you are done with the top, very gently flip the pillow over and start on the bottom. It’s okay if a few fall out, just push them back on.
See?! Almost done! Looks pretty darn good so far, if I do say so myself. If there are any gaps or holes, just take a smaller mum and fill it in. Be sure to double check everything before you finish.
Step 6:
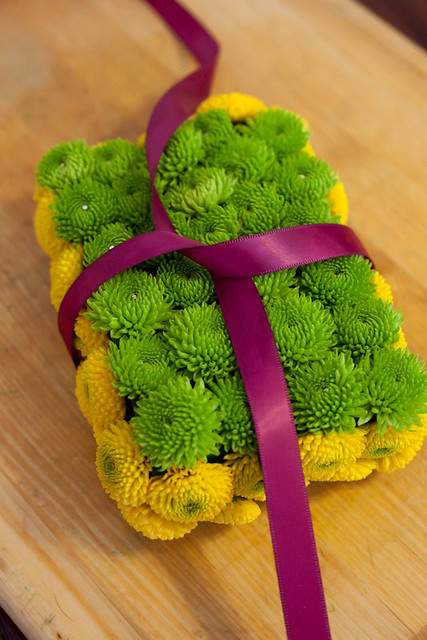
Take a piece of ribbon and tie it on like you are wrapping a present. Be sure to double knot everything so the ribbon doesn’t slip. You can also pin down the ribbon on the bottom so it won’t move around or slip off.
Step 7:
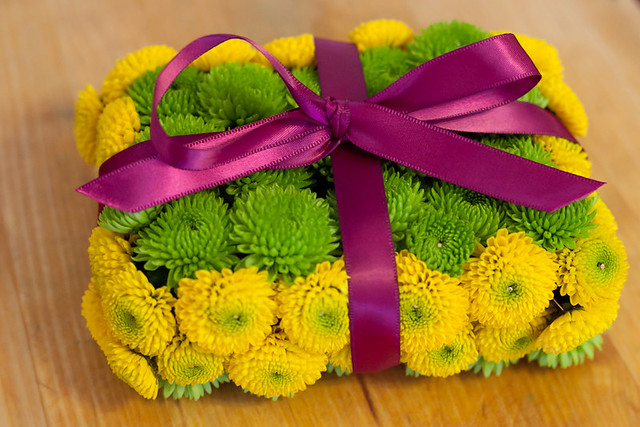
Tie a bow on top and you are so close to being finished! Just one more step to go, and I think you can guess what it is you do next...
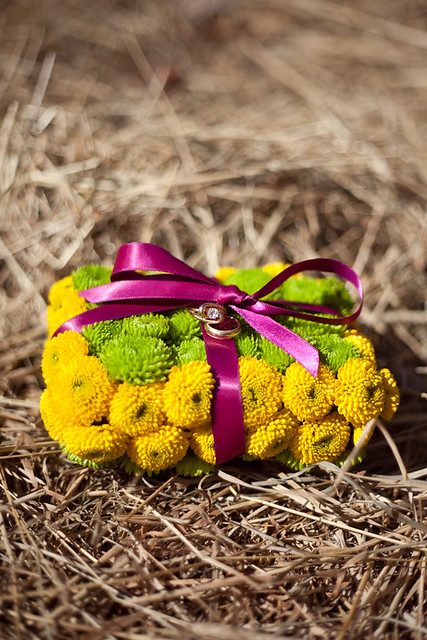
Step 8:
Tie on the rings and you are DONE! And this step you don’t even have to do till it is time to walk down the aisle. My suggestion: do no have the real rings on the pillow. I have seen wedding rings go flying so many times while photographing weddings! So just tie on some fake rings, that way you don’t loose your rings and the ring bearer will still feel super important (and don’t tell him they’re fake!).
And that’s it! I highly suggest making one or two practice pillows, that way you know how it feels to make them. A few other suggestions I have are…
- Use larger pins. I bought a packet with different size pins, ranging from half an inch to two inches. The two-inch pins worked best since some of the mums were pretty wide.
- They sell special glue that sticks to this foam. I would buy it and have a dab of glue on each mum. You don’t want flowers falling off mid aisle, and you don’t want tears when the ring bearer pokes his had on a pin.
- Make your final pillow the afternoon before your wedding. Store finished project safely in the refrigerator, that way the flowers won’t die on you.
This project took me just about an hour to make, and that includes clean up time. I bought the flowers at the grocery store and everything else I bought at AC Moore (pretty much one of my favorite places in the world). All together, this project cost me $29.21- perfect for a bride on a budget! Also be sure to check on the AC Moore website, they have coupons for the store every week. I had a 40% off one item coupon. Every little bit counts!
So, what do you think? Is this something you would do for your wedding? What colors would you use? Any ideas that would make it more personal and unique? I would love to hear what you think!
No comments:
Post a Comment